 I am preparing home canning jars for the season ahead. I haven’t canned for about 15 years. I’ve been busy raising kids, not gardens. But this year I am giving it a try again. As I was rounding up all my canning supplies, I realized that my jars were haphazardly stored. So, I’ve decided to write down for myself, and you, how to properly store the jars for next time.
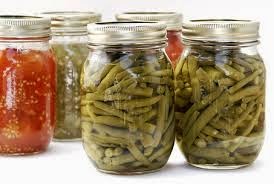
- When you empty a jar, wash it, remove any labels or markings
- Inspect jar for cracks or nicks, especially on the lip of the jar
- Scrub ring and lid, thoroughly dry
- Put all pieces back together, assembled, to store
- Have a designated place to put jars as they become empty
This sounds simple and silly, but jars are much easier to clean and inspect one or two at a time rather than dozens at a time. Storing the jars with the seal lid keeps dust and bugs from getting into your stored jars. Do NOT re-use the seal lids. The old one is just a dust cover until next year. Jars are much easier to stack if they are assembled. Storing the jars with the rings screwed in place, protects the lip from chips and trauma. If the lip is damaged, the jar is junk. Throw it away. The seal will not set to a chipped rim. It only takes one spot to prevent a good seal. I’ve worked too hard getting this stuff, to let it get ruined now. Rings should be inspected for good threads. Rings can get rust spots on them, which is fine as long as the ring is still strong and the threads are solid. Canning jars can be used for dozens of years, if properly cared for.
So I am going to be more diligent about my storage for next year. Properly cared for canning supplies can make home canning safe and enjoyable for years.
If you are interested in more hints and tips, stay tuned to BeginPreppingNow.com !
Have you guys been busy canning? Montana didn’t get above freezing at night until the middle of June! My garden was so sad! Hope you did better!