When the power goes out and something in the house breaks at the same time, a cordless drill with a dead battery and a saw with a cord are not much help. A hammer, a wrench and a pry bar work the same on a dark night as on a sunny afternoon. This article covers manual tools for home emergency repairs: which ones to buy first, which jobs each one handles, and how to build the kit slowly on a small budget.
The focus is a handful of tools that cover the most common trouble: a burst pipe, a broken window, a stuck door, a fallen fence and a leaking roof. Nobody needs a garage full of equipment for these. Most of them can be held off with a few well-chosen tools until daylight or a professional arrives.
Why hand tools keep working when everything else stops
A hand tool needs nothing but you. There is no battery to charge, no cord to run to an outlet and no fuel to find. Cordless tools are handy, but a battery that was half charged when the storm hit will not last through a long repair. Corded tools are useless without an outlet or a generator.
Hand tools also last a very long time. A claw hammer or a pry bar that is fifty years old will often work as well as a new one, which is why secondhand shops are full of them. That matters when your budget is tight, because a used hand tool can cost a small fraction of a new power tool.
Most emergency repairs are temporary by nature. The goal is to stop the damage from spreading: shut off the water, keep the rain out, close up the opening. A proper repair can wait for daylight, a dry week or a licensed tradesperson. That means you do not need a perfect workshop, just a few tools that hold things together for a day or two.
A few situations call for a professional right away, and no tool kit changes that. If you smell gas, see sparks, or have water near electrical outlets or a breaker panel, consider stepping back and calling the utility or an electrician. The same goes for any power line that has come down. Stay well away from it, and from anything touching it, including a fence or a tree limb.
You are allowed to take this one repair at a time. Most of what goes wrong in a house can be steadied with simple tools and a little patience.
Start with these five: the cheapest tools that handle the most repairs
If you can only buy a few things, consider these five. Together they cover a surprising share of the jobs in this article, and none of them needs to be a premium brand to be useful.
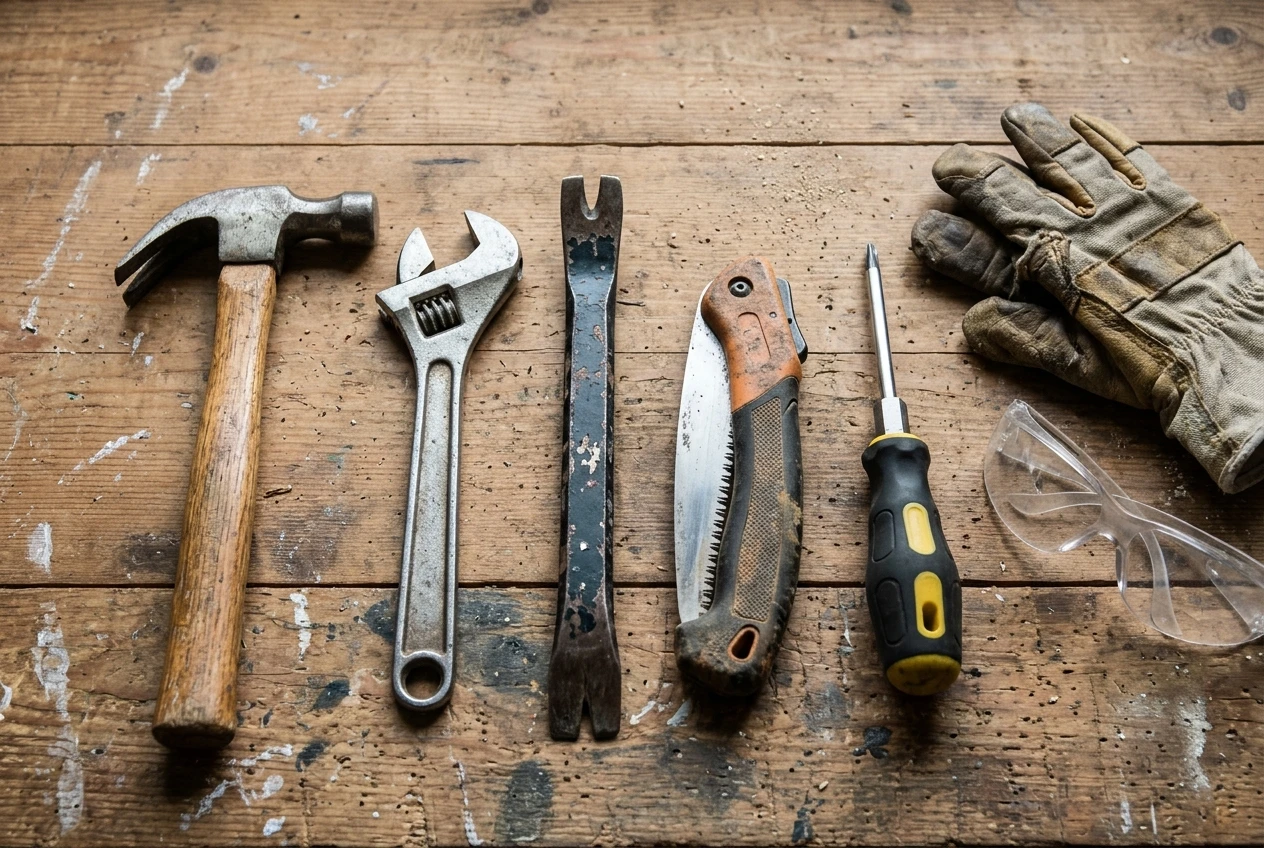
- A claw hammer. It drives nails to hold boards and tarps in place, and the claw pulls nails back out. It also taps stuck hinge pins loose, which comes up in the door section below. A mid-weight hammer with a solid handle is a good all-round choice.
- An adjustable wrench. This one is the main water shutoff tool for many homes. It also tightens pipe clamps and hose clamps and loosens fittings. A larger one, around ten or twelve inches, gives you more reach and grip than a small one.
- A flat pry bar. Also called a flat bar or wonder bar, it pulls nails, lifts boards off a window frame, nudges a swollen door and separates stuck trim. It is thin, strong and usually inexpensive.
- A handsaw or folding pruning saw. A pull saw cuts on the pull stroke, which makes it easier to control. It handles fallen limbs, plywood and scrap lumber for bracing. A folding version fits in a bag and is safer to carry.
- A multi-bit screwdriver or a small screwdriver set. Hinges, cabinet hardware, door hardware and window screws are mostly driven by screws. A set with both flat and Phillips heads covers most of them. A multi-bit screwdriver is the most compact, however if you lose the bits it’s useless. Second hand screw drivers can be found readily, and they are much easier to handle in adverse situations.
A few small supplies ride along with the five tools and are worth adding when you can. Work gloves and safety glasses protect you from splinters, glass and flying debris. Long sleeved work shirts to protect your arms and keep you warm in ugly weather. A utility knife cuts tarps, plastic sheeting and tape. A roll of duct tape, a heavy tarp and a box of screws and nails round out the extras that you will need.
None of this has to happen in one trip to the store. Even the first two or three tools make you better prepared than most households.
Stopping water: what to keep for a burst or leaking pipe
Water damage gets worse by the minute, so the first job is always the same: shut off the water. Find your home’s main shutoff valve ahead of time. It is often where the water line enters the house, near a water heater, in a basement, a crawlspace, a utility closet or by an outside wall. Some are round wheel handles, and some are lever handles that turn a quarter turn.
Older valves can be stiff or stuck. Consider checking yours once when nothing is wrong, and turning it off and on gently to confirm that it moves. An adjustable wrench gives you the leverage for a handle that will not turn by hand. If a valve does not work, a plumber can replace it before an emergency does the testing for you.
- Spray down the shaft of all shutoff handles in your home annually . Spraying a handle a couple of times with WD-40 or Free-All a couple of times, and let it soak for a couple of hours, before you attempt to turn it if you haven’t turned it before. These products soak into the cracks and breaks down rust. It will increase the chances of success. I spray shut off handles under sinks, behind toilets the valve at the bottom of the water heater and the mains.
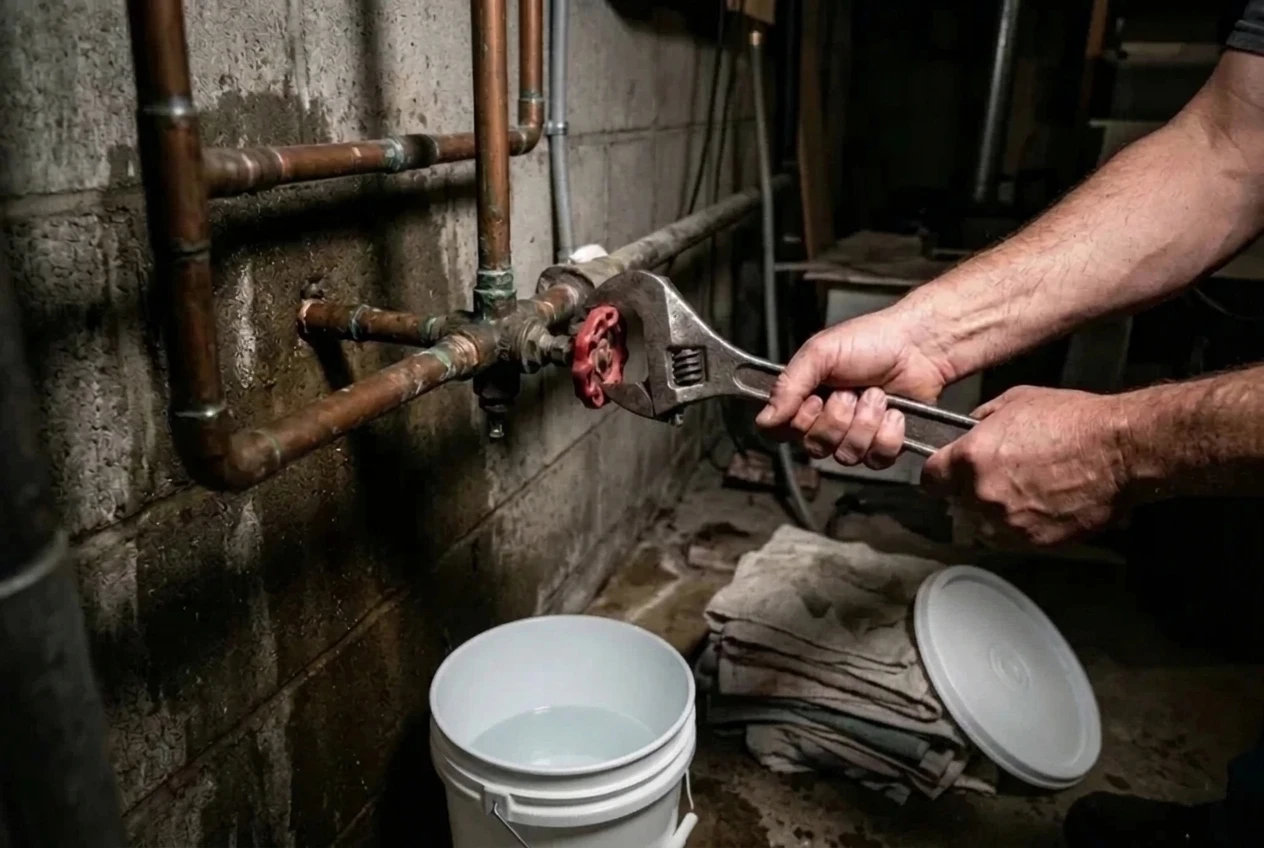
Once the water is off, open a faucet at the lowest point in the house to drain the remaining water out of the lines. A clean bucket will allow you to save the clean water. A few old towels will handle whatever is left.
If you have stored water, this is when it earns its place, since the taps are dry until the pipe is fixed. The article on how to store emergency water at home covers how to do that without spending much or needing much room.
For the pipe itself, a few low-cost items make a temporary repair possible:
- A pipe repair clamp. This is a rubber sleeve with a metal band that tightens around a small split or pinhole. Match the size to your pipe, and measure the pipe’s outside width before buying. Have a box handy that has at least 1 fix kit for each size pipe that’s in your home. A couple would be better.
- A rubber patch with hose clamps. A piece of thick rubber, such as an old inner tube or a length of garden hose slit open, wrapped over the leak and tightened with two hose clamps works as a stopgap. I would put some flexseal paste on the pipe before I applied the rubber piece. It is an added layer of protection. Let it dry completely, according to the instructions, before you turn the water back on.
- Self-fusing silicone repair tape. It stretches and bonds to itself when wrapped tightly. It is best as a short-term seal on a pinhole leak, not a permanent fix.
- A hacksaw. It cuts out a damaged section of pipe if you eventually replace it. Copper and plastic cut with fine-toothed blades.
A manual tubing cutter for copper makes cleaner cuts than a hacksaw, but it can wait until your budget has room for it. Likewise, push-to-connect couplings let someone without soldering skills join a cut pipe, but they cost more and are can be added later.
These patches are meant to last until a plumber can make a proper repair, so there is no need to feel you have to do it all yourself. Turning the water off and keeping the leak contained is already the most important part of the job.
Boarding up and patching: windows, doors and a leaking roof
A broken window
Glass is the first hazard. Put on gloves and safety glasses before you touch anything. Consider removing large loose pieces from the frame by hand, working from the top down, and dropping them into a sturdy box or bucket rather than a trash bag.
To cover the opening, a sheet of plywood cut to size is the strongest option. If you have the ability to buy plywood, cut a piece for each window, and label it with the window it covers. It can be screwed or nailed to the frame, or to the wall around it.
If you do not have plywood, heavy clear plastic sheeting held down with wood strips or tape will keep out rain and wind for a night. A utility knife cuts the plastic, a screwdriver or hammer secures the strips, and a handsaw trims scrap lumber to length.
Measure the window opening, and keep the numbers on a piece of paper in the kit. Having them on hand saves you from fumbling with a tape measure in poor light, and it lets you cut a board ahead of time if a storm is forecast.
A door that will not close or lock
If a door has been damaged, the same board-and-screw approach can hold it shut. A few scrap boards across the frame, screwed into the wall studs on both sides, will secure an opening until it can be repaired. A screwdriver handles screws that are already in the door hardware.
A leaking roof
A roof leak is best handled from inside until the weather clears. Put a bucket under the drip, and move anything valuable out of the way. A wet roof is slippery, so consider staying off it while it is raining or while shingles are still wet.
When the weather is dry and you have daylight, a tarp is the standard temporary fix. Lay it over the damaged area so that it reaches past the leak by a few feet on every side, and extend it over the ridge if you can. Nailing through the tarp itself will tear it. A better method is to wrap the edge of the tarp around a thin wood strip, often called a furring strip, and nail the strip down through the wrapped fabric. That spreads the load and keeps the tarp from ripping loose in the wind. If you can run a line of caulking along the top under the tarp before you screw it down.
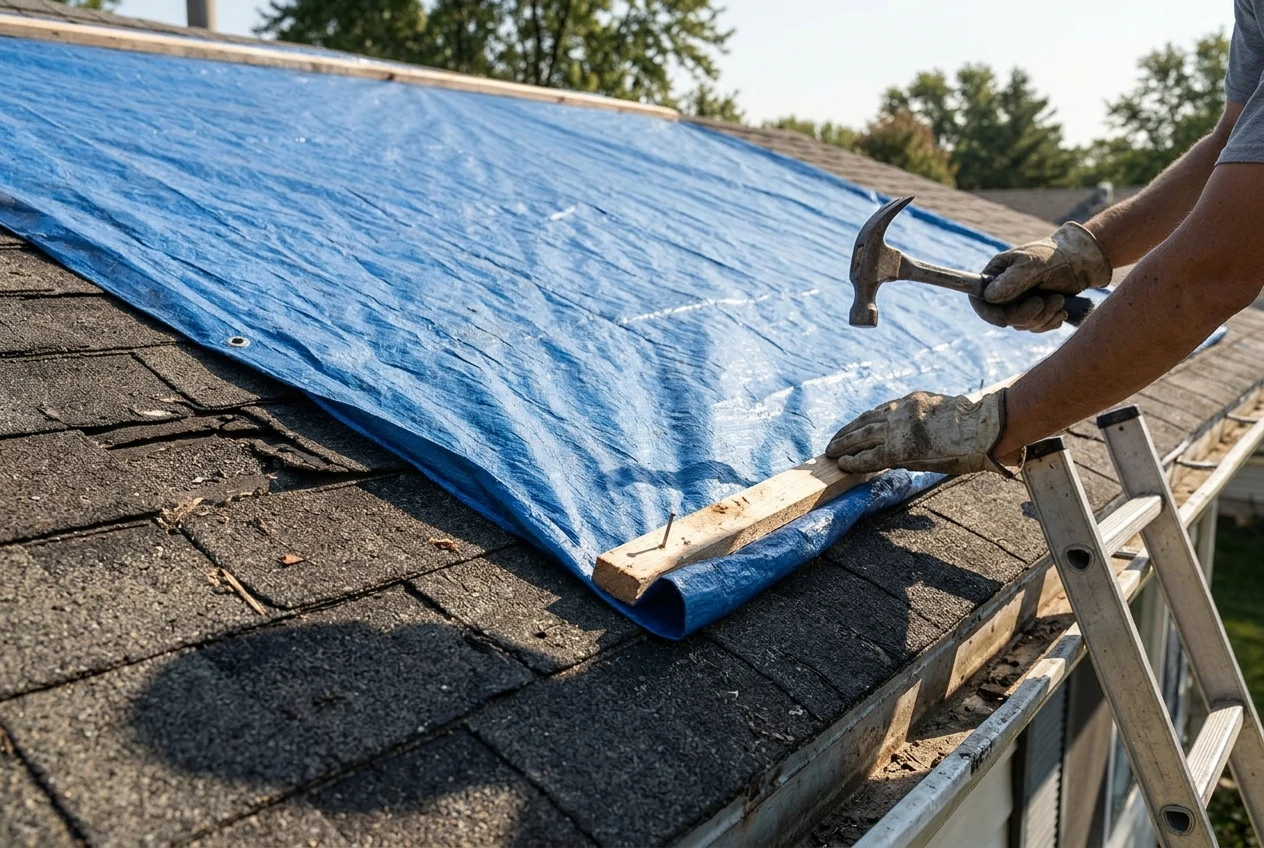
You will need a ladder for this, and a ladder is one of the pricier items on any list like this. If you do not own one, consider asking a neighbor or relative who does, and agree on that arrangement before you need it. Roof work is the one job here that is worth waiting for help on if conditions are poor.
A hammer, a utility knife, a handful of roofing nails or screws, a few wood strips and a tarp are enough for a short-term fix. A good patch only has to hold until the roofer can come.
Cutting, prying and clearing: handling fallen limbs and stuck doors
Fallen limbs
After a storm, a limb across a yard or driveway is often the first thing in the way. A folding pruning saw or a bow saw handles limbs that are a few inches thick. A pruning saw is the cheaper and more compact choice, and a bow saw cuts faster on bigger pieces.
Before you cut, look up!! If a limb is touching or near a power line, leave it alone and call the utility. Limbs that are bent under tension can also spring when cut, so consider cutting from the side that keeps you out of their path. Gloves and glasses are worth wearing for any sawing job.
A downed fence
A fence panel that has blown over can often be stood back up. A shovel digs out the soil around a leaning post, and a pry bar pulls bent or loose nails. A hammer drives new nails or tacks the panel back, and a couple of scrap 2x4s braced diagonally against the post will keep it upright while the soil settles.
If the fence is wire, a pair of fencing pliers or heavy wire cutters is a better fit, since they can cut and twist wire. Those can wait until you have more than the first five tools. A basic pair of slip-joint pliers can stand in for a while.
A post hole digger is also a manual tool, but it is a later purchase. A shovel does most of the same work, only more slowly.
A stuck door
Wood swells in damp weather, and a swollen door can rub against the frame so badly that it will not close or open. Before reaching for a plane or saw, consider checking whether the hinge screws have worked loose. Tightening them with a screwdriver often moves the door back into position. Also put some 3-in-1 oil on hinges.
If the door still sticks, look for the shiny spots where it rubs the frame. Those mark where wood needs to come off. A hand plane or a sanding block removes it gradually. Both are inexpensive and easy to find secondhand.
If a door needs to come off its hinges, tap each hinge pin up from the bottom with a hammer and a long nail or screwdriver, then lift the door free. A pry bar helps if the pins are stubborn. Take your time and keep a hand on the door so it does not fall. A helper is extremely helpful for this project.
Exit doors are a special case. If a door that people rely on to leave the house is jammed, it is worth fixing quickly, and it is worth having a second way out in mind for anyone in the household.
Small jobs like these are mostly about patience, and a steady pace tends to do less harm than a fast one.
Buying secondhand and building the kit slowly, one tool a month
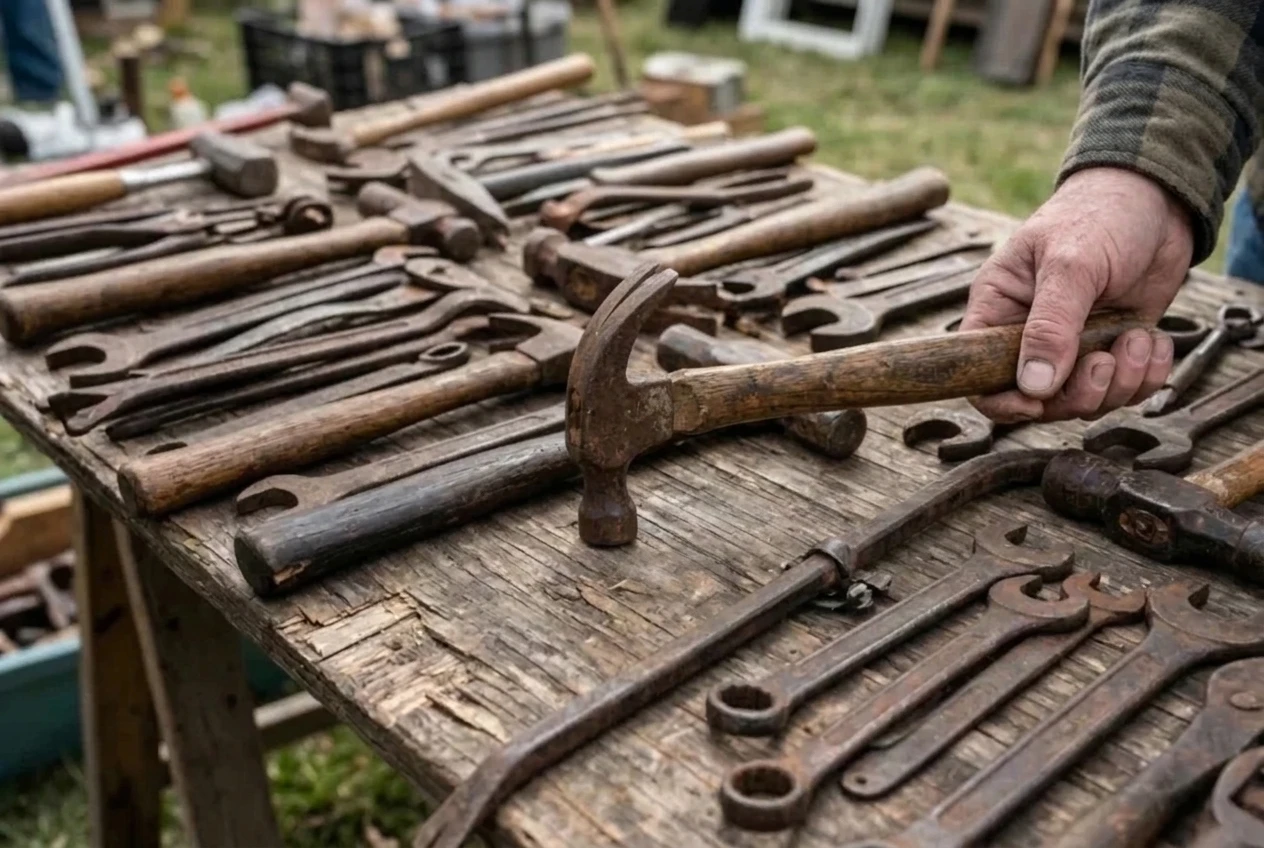
You do not need to buy everything new, and you do not need to buy it all at once. A simple approach is to add one tool at a time, starting with the five tools above. A month apart is slow enough that it barely touches the budget, and in a year you will have a kit that most households do not own.
I have found all of these items at garage sales, on Facebook Marketplace and in thrift stores.
A reasonable order might be:
- Claw hammer
- Adjustable wrench
- Flat pry bar
- Folding pruning saw or bowsaw
- Screwdriver set
- Work gloves and safety glasses
- Utility knife
- Pipe repair clamp and hose clamps
- Tarp and a few wood strips
- Hacksaw
Good places to look for used hand tools include yard sales, estate sales, flea markets, thrift stores and online listings. You can also check pawn shops. Relatives and neighbors who are clearing out a garage may also be glad to pass tools along. Many older folks will gladly swap some old things from the garage or basement for a pan of lasagna. Old tools are often better made than cheap new ones and it can be a great way to form strengthen relationships and open lines of communication.
When you inspect a used tool, a few quick checks will save you from a poor buy:
- Hammers: The head should sit tight on the handle with no wobble, and the handle should have no cracks or deep splits.
- Wrenches: The jaws should close evenly and hold their grip without slipping. Worn, rounded jaws will slip off nuts.
- Saws: The teeth should be intact and the blade straight, with no kinks. If you buy a standard size you can buy replacement blades as well.
- Pry bars: Look for bends, cracks or chipped edges.
- Screwdrivers: The tips should be square and not chewed up or rounded.
Surface rust is usually fine and can be cleaned with a bit of oil and steel wool. A crack, a bent shaft or a loose head is a reason to leave the tool on the table. Safety gear, such as glasses and gloves, is better bought new if you can.
A tool you can afford and use is better than a better tool you cannot yet buy. A steady pace will get you there.
Where to keep your tools so you can find them in the dark
A good kit is only useful if you can reach it quickly. Keep all of the tools together in one place, such as a five-gallon bucket, a canvas tool bag or a small plastic bin with a lid. A bucket has the extra advantage of doubling as a bailing bucket if you have a water leak. I like to make a kit in a bucket with a lid, and stage it close to where it will be used. This saves scrambling to find parts under distress.
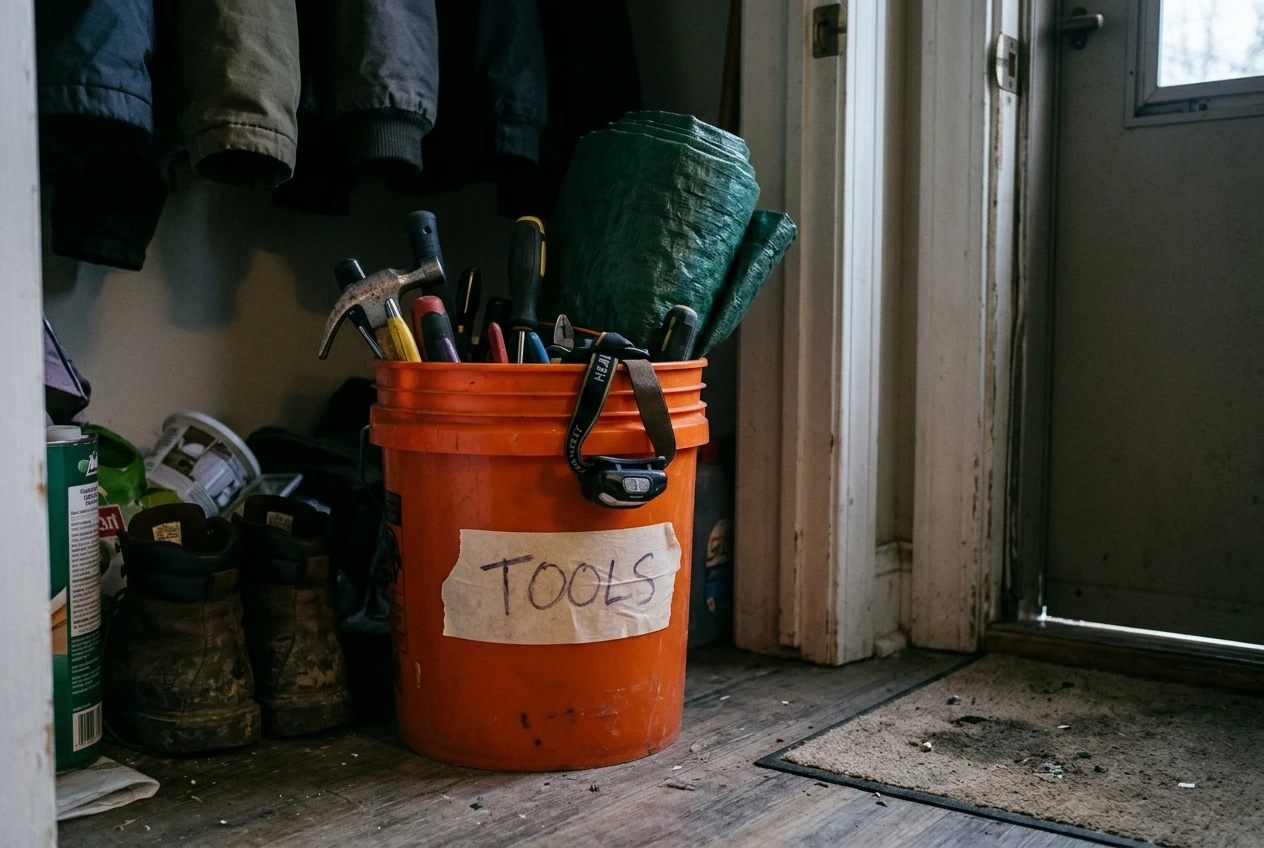
Choose a spot that is dry and easy to reach, such as a hall closet, the space near a back door, or a shelf in a utility room. Damp basements and sheds can rust metal tools, so consider wiping them with a lightly oiled rag before you store them. A rag in the bag also works as a quick wipe-down after use.
Make sure that everyone in the household knows where the kit is. If you live with others, the person who is home during a storm may not be you. A small label on the bucket or a note taped inside the closet door can help.
A few things are worth keeping with the kit:
- A flashlight or headlamp. This is the one battery item in the list, so consider keeping spare batteries in a separate bag so they do not drain inside the device.
- A paper note with the location of the main water shutoff and the measurements of your windows.
- A short list of phone numbers, such as the utility company, a plumber and a neighbor with a ladder.
Walk through the kit once in a dim room to see how easy it is to find what you need by touch. If you can lay hands on the hammer and the wrench without turning on a light, the arrangement is working.
What to skip for now (and what can wait until your budget grows)
A lot of tools are good ones that you simply do not need yet. A big boxed set with hundreds of pieces often includes many items you will never use, and the pieces you need are frequently lower quality. Buying single tools is usually a better use of the money.
Here is what to leave off the list for now:
- Power tools of any kind. They are not part of a no-power plan, and hand tools cover the same jobs more slowly.
- A chainsaw. It is useful but loud and risky for someone without experience. A folding saw handles small limbs, and a professional or neighbor with the right equipment can handle big ones.
- Specialty tools you have not needed. A glass cutter, a roofing hatchet or a caulking gun are examples that only make sense once you have a specific job in mind.
- Gadget-style multi-tools with many functions. They are often weaker at every function than a single-purpose tool.
A few things are worth saving for later:
- A manual tubing cutter for copper pipe
- Fencing pliers
- A post hole digger
- A bow saw for thicker limbs
- A hand plane for doors
- A sturdy extension ladder
- A larger pipe wrench for stubborn fittings
None of these is a bad idea. They simply give you less in return than the first five tools do. When your budget has room, adding them makes the kit more complete.
A small kit that you know how to use will serve you better than a large one that sits in a box. Each tool you add makes you a little more capable, and you can stop whenever you feel you have enough.
Consider reading Prepping in Stages next, to see how a small tool kit fits into a calm, step-by-step plan you can build at your own pace.
